Let’s take a quick break from the philosophical and answer a very basic question: How do you choose light fixtures? The answer is different from room to room and from person to person, but here are a few tips to guide the process for your dining room.
Step 1: Choose a Size
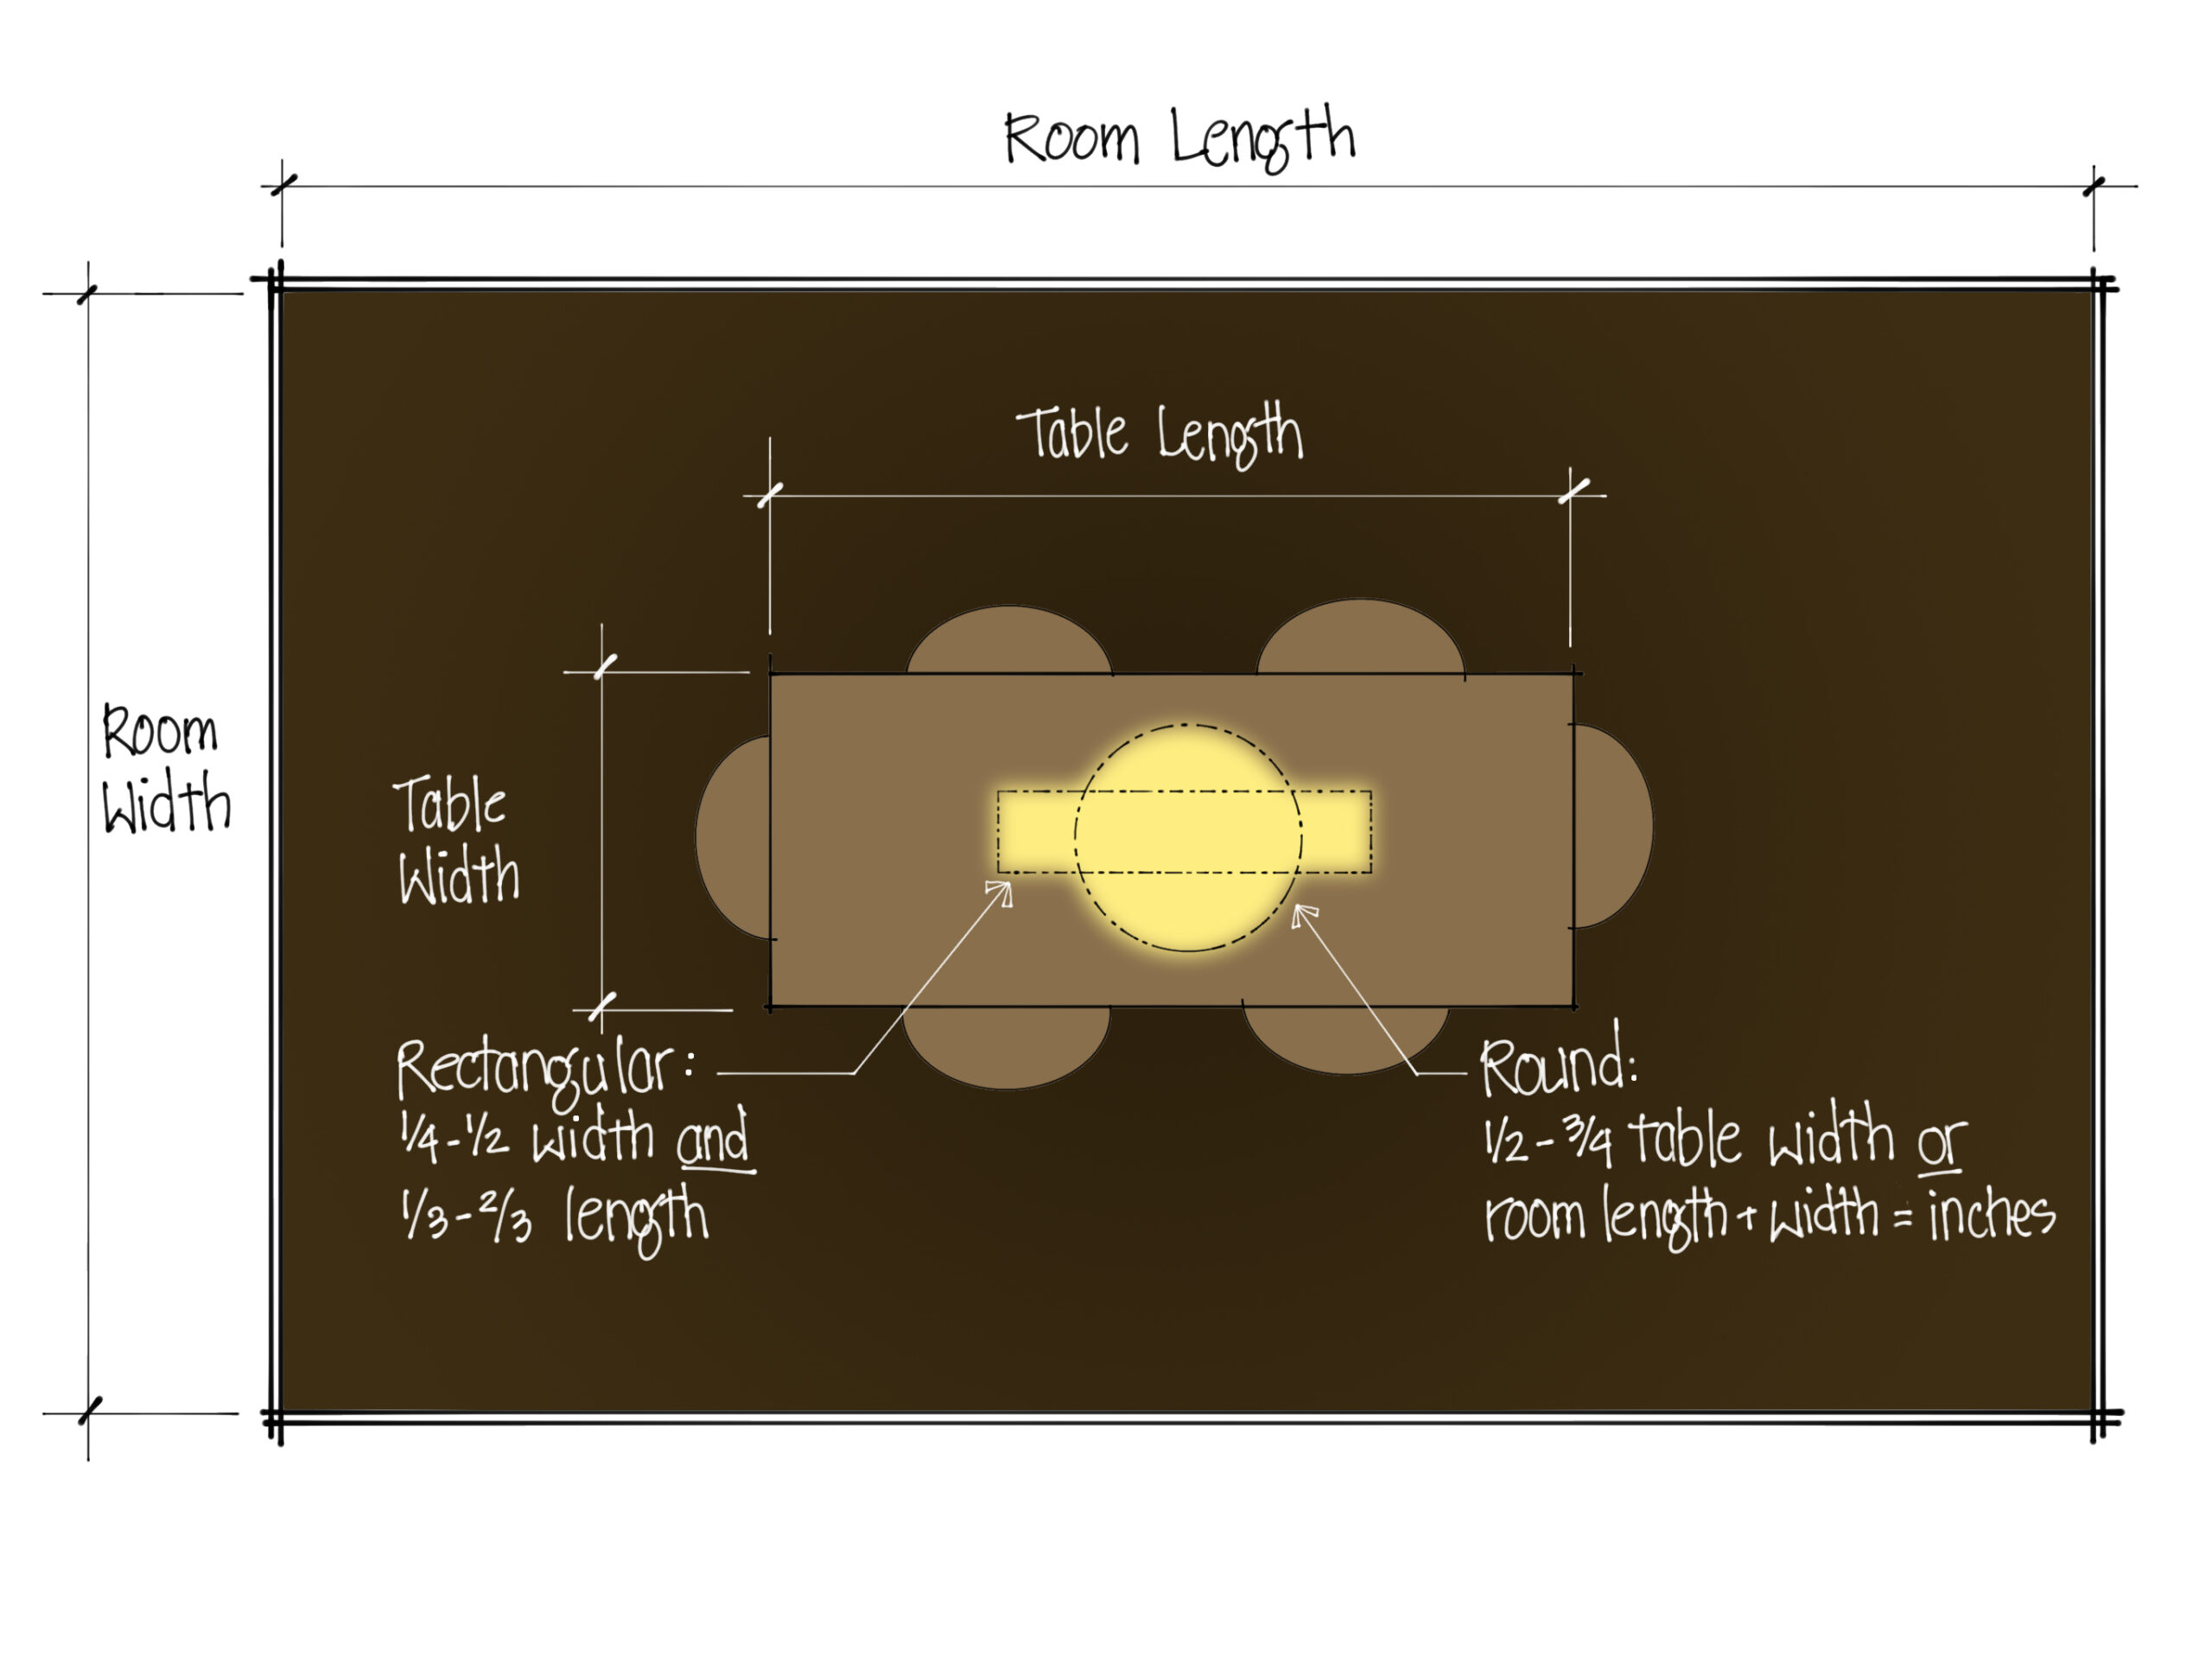
Most online chandelier-sizing guides are made for circular fixtures, until recently about the only kind you could buy. But rectangular tables today can also be lit with rectangular pendants, so a little more information can be useful.
My rule of thumb for a rectangular chandelier is to fit between 1/4 and 1/2 of the width of the table and between 1/3 and 2/3 of the length. So if you have a 40″ x 96″ table, a rough guideline for a pendant would be between 10-20″ wide and 32-64″ long.
Sticking with the more traditional round shape? No problem- the internet is full of buying advice. Common wisdom says keep it between 1/2 and 3/4 of the table width, or 20-30″ for our example table. Don’t have a table yet? Try adding the room dimensions together in feet- say 12′ + 20′ = 32′ and converting the answer to inches. That would give you a 32″ diameter chandelier for our room.
Step 2: Choose a Height
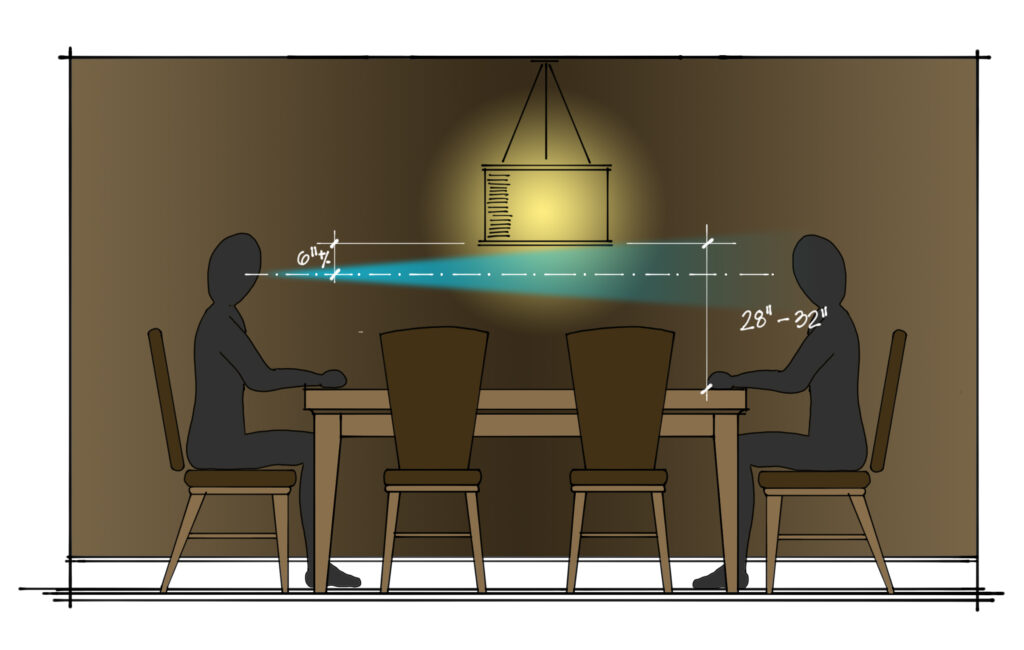
In many cases, there is no reason to buy a chandelier if you are going to hang it so far above the table that no one sees it. Hanging it lower will do a better job of illuminating the table, cast a glow on faces, and add sparkle to the room.
Common wisdom is to hang the chandelier between 28-32″ above the table (to the bottom of the chandelier). Practically speaking, we’re trying to hang it just above the eye level of the most common users, say about 6″. This allows for a clear line of sight across the table while keeping the chandelier good and low.
Step 3: Choose a Style
Modern, traditional, transitional, whimsical…as a lighting designer, the aesthetics of the fixture do not matter as much to me as the light that the fixture emits. So while you are shopping for a fixture that looks good, keep an eye out for fixtures that lights good, too (grammatical no-no intended for poetic repetition…looks good & lights good…well, this is a blog, which means it is a place to try things!). A chandelier that looks good is entirely subjective and can be relative to your space. I cannot choose that style for you.
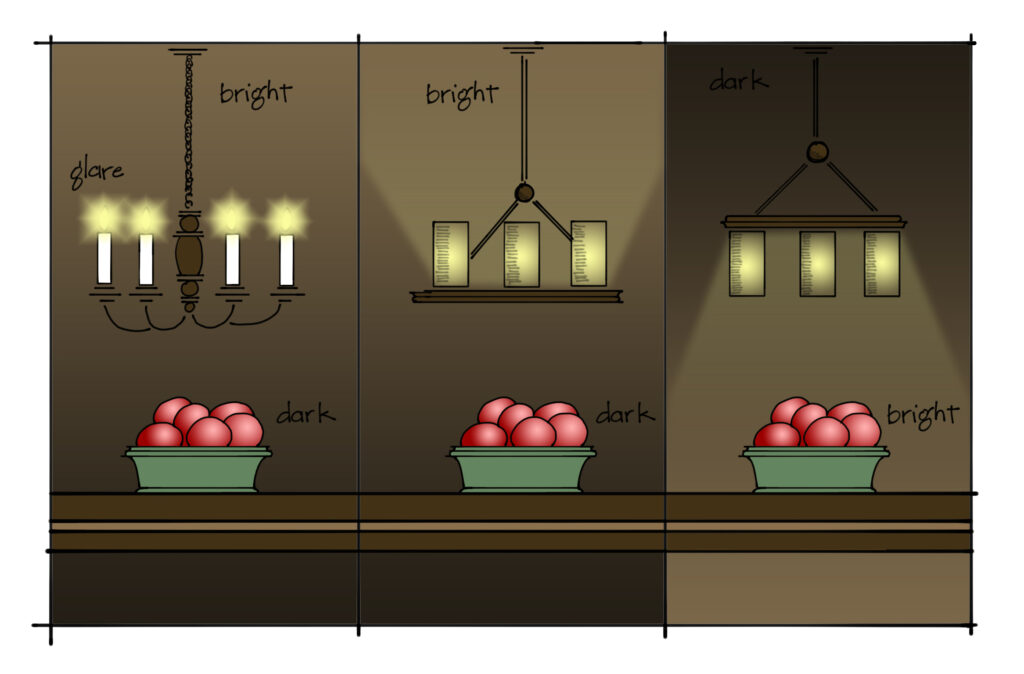
A chandelier that lights well? With that I can help. Think about the kinds of light you need at the table: light on the table, soft light on the faces of your friends and family, and perhaps a little light on the ceiling or about the room.
The diagram above shows a couple of basic styles. Chandeliers with bare bulbs put glare in your face, shadows on the table, and bright spots on the ceiling (shades will help considerably). Fixtures with uplight are well-suited for providing soft light on the faces of your guests but also treat the ceiling (usually just white drywall) as the most important surface in the room and ignore the table. Look for fixtures that direct light down towards the table and enclose bulbs in frosted shades to emit soft light on people and in the room. That’s the style!

Step 4: Choose the Bulbs
This part used to be easy, but now there are so many choices that even I get confused standing in the light bulb aisle of my nearby Home Depot. Here are a few quick tips:
- For most homes, choose 2700K Warm White LED bulbs. Have a space with a lot of cool colors, like crisp whites, blues, and grays? Consider 3000K.
- Buy dimmable bulbs that dim to 1%. Dimmers are a must for setting the right mood in a dining room. No one has a romantic candle-lit dinner in Walmart. Too bright!
- Look for “warm-dimming” bulbs that color shift from 2700K down to “candlelight” or as low as 1600-2000K. These will mimic the dimming of an incandescent bulb and glow warmly and softly when dimmed.
The illustration above shows it all. Warm light on the left, slowly dimming to candlelight before fading out completely. You know, what our old incandescent light bulbs did without thinking.
Don’t Forget Layers!
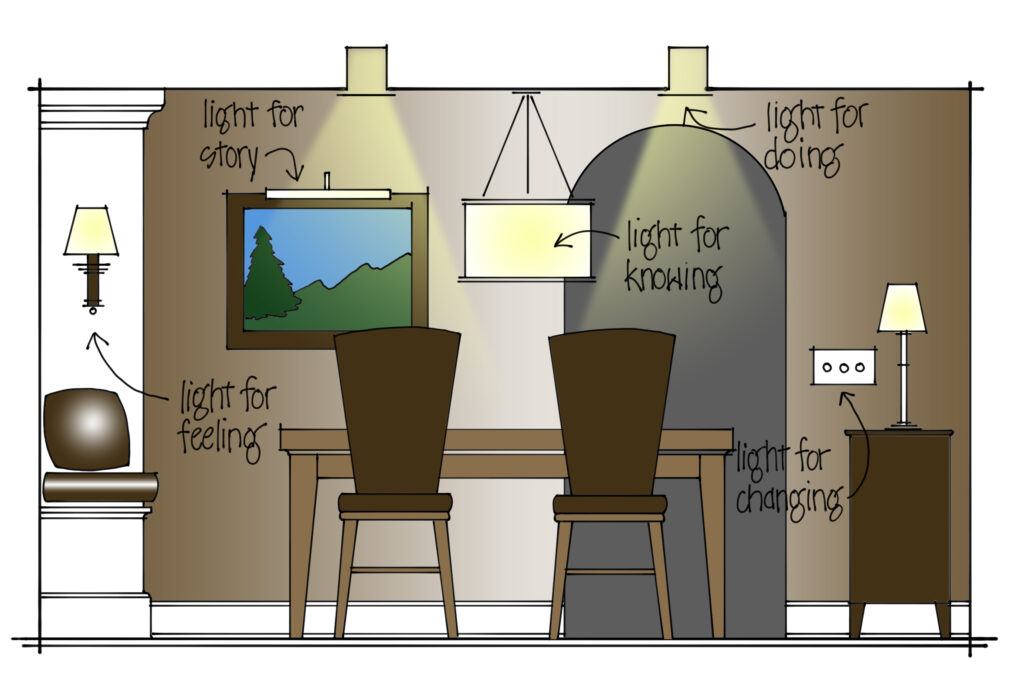
Sigh. Here’s David complicating things even as he tries to simplify the process. Now that you found the perfect chandelier, check out how to get all five promises of the gift of light into your dining room. Layering in light for doing, light for knowing, light for feeling, light for changing, and light for story will give you a room in which guests linger, even if you’re serving Spaghettios. Well, maybe.
Additional resources:
Light for Knowing: A Dining Room
My Dining Room Article on Houzz.com