Another one just came across my desk: a kitchen where the plans call for lighting placed precisely in the wrong place. Chopping with large knives and dealing with hot pans is no place for poor lighting and obscuring shadows, and this is just one reason kitchens have the most at stake when it comes to lighting. If you put lighting in the wrong place in your kitchen, it will also be very, very expensive to fix.
Which means you may save a few band-aids and a few dollars if you get it right the first time.
Twenty years into my lighting career, I still believe that lighting design is not rocket science. But it does help to have some experience and to slow down and think things through. Unfortunately, of the hundreds of thousands of new homes built each year in the United States, that does not seem to happen very often.
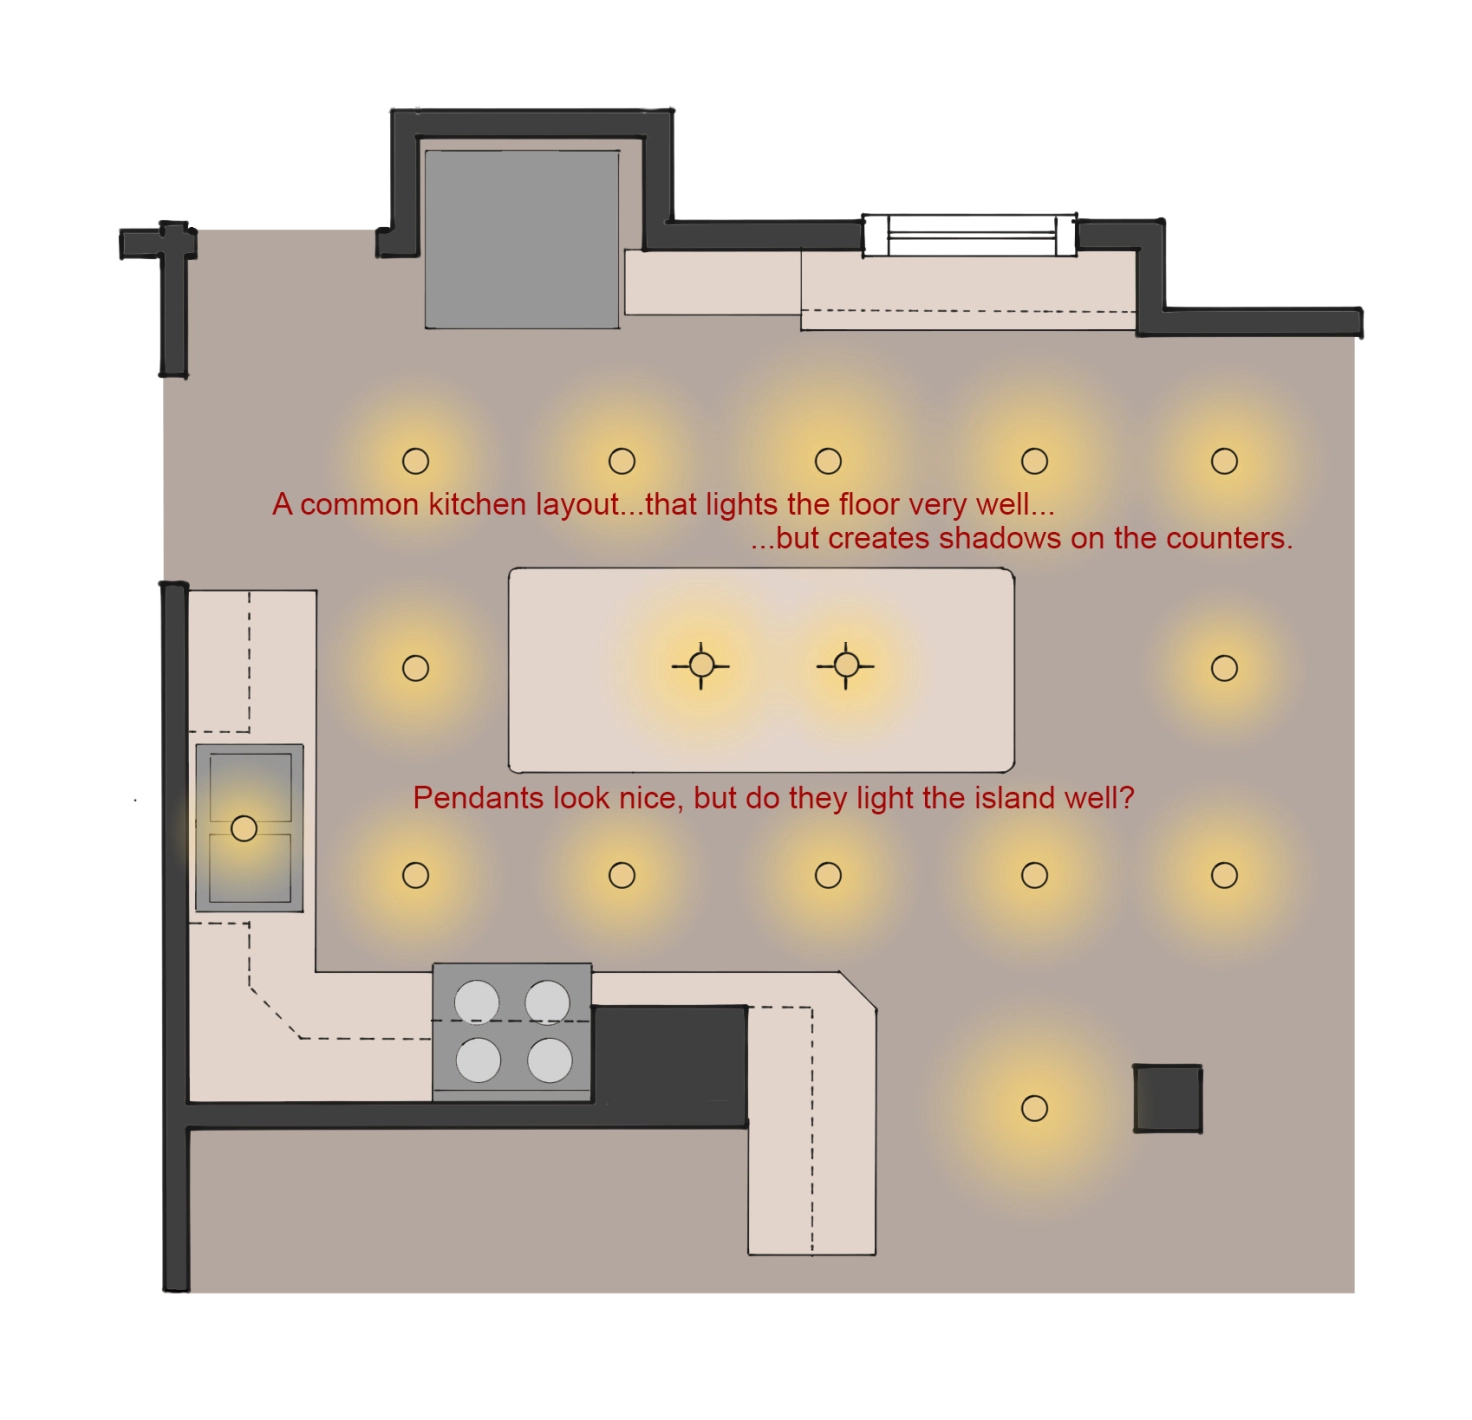
How else to you explain the all-too-common kitchen lighting plan that calls for better lighting on the floors than the countertops?
I realize not everyone is going to click on lightcanhelpyou.com and hire me to design lighting for their new home. If you’re on your own, use this guide to help lay out your kitchen lighting plan, and protect your fingers while you make the space more livable.

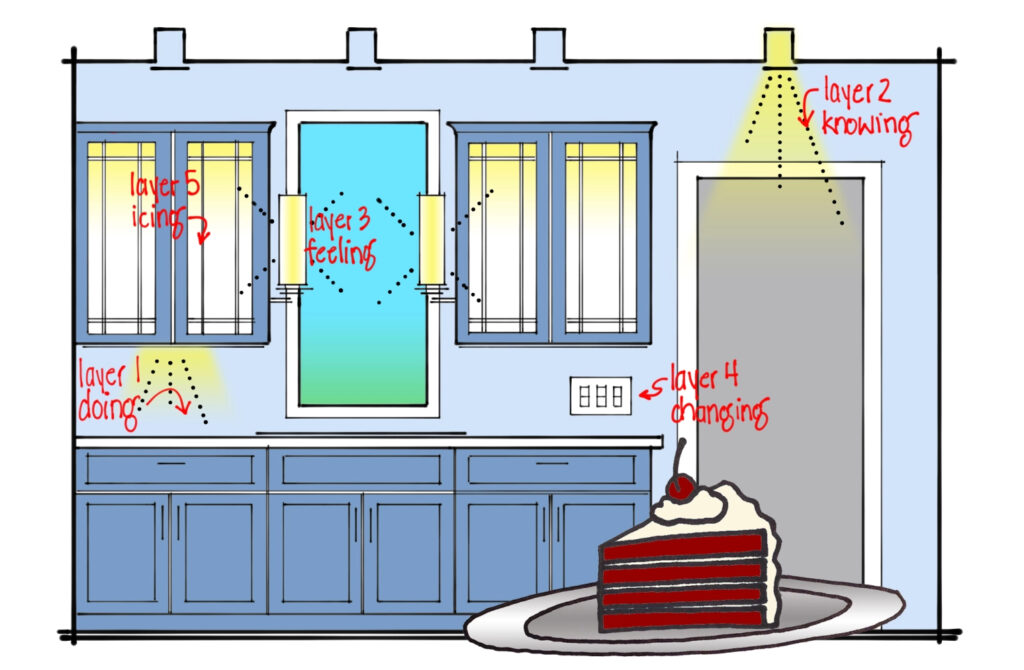
Step One: Light the Counters
This one should be a no-brainer, but it is amazing how often this gets left to chance. Instead of using a few very large, very bright recessed downlights, I recommend using more smaller fixtures. The overlapping beams of light will help better light the counter by canceling shadows, and the smaller opening can mean less glare. Avoid the shallow “disk” style lights that are popular now; they will light the cabinets well but leave the counters lacking.
We spend a lot of time at the sink, and the shadows from a single downlight can be quite off-putting. Three small downlights do a much better job and make the space more pleasant as well.
I recommend LED under-cabinet lighting for nearly every project to help reduce shadows and make it easier to avoid fingers while chopping vegetables. It’s easy to get another carrot, but not so easy to get another finger.
Read more on under-cabinet lighting.
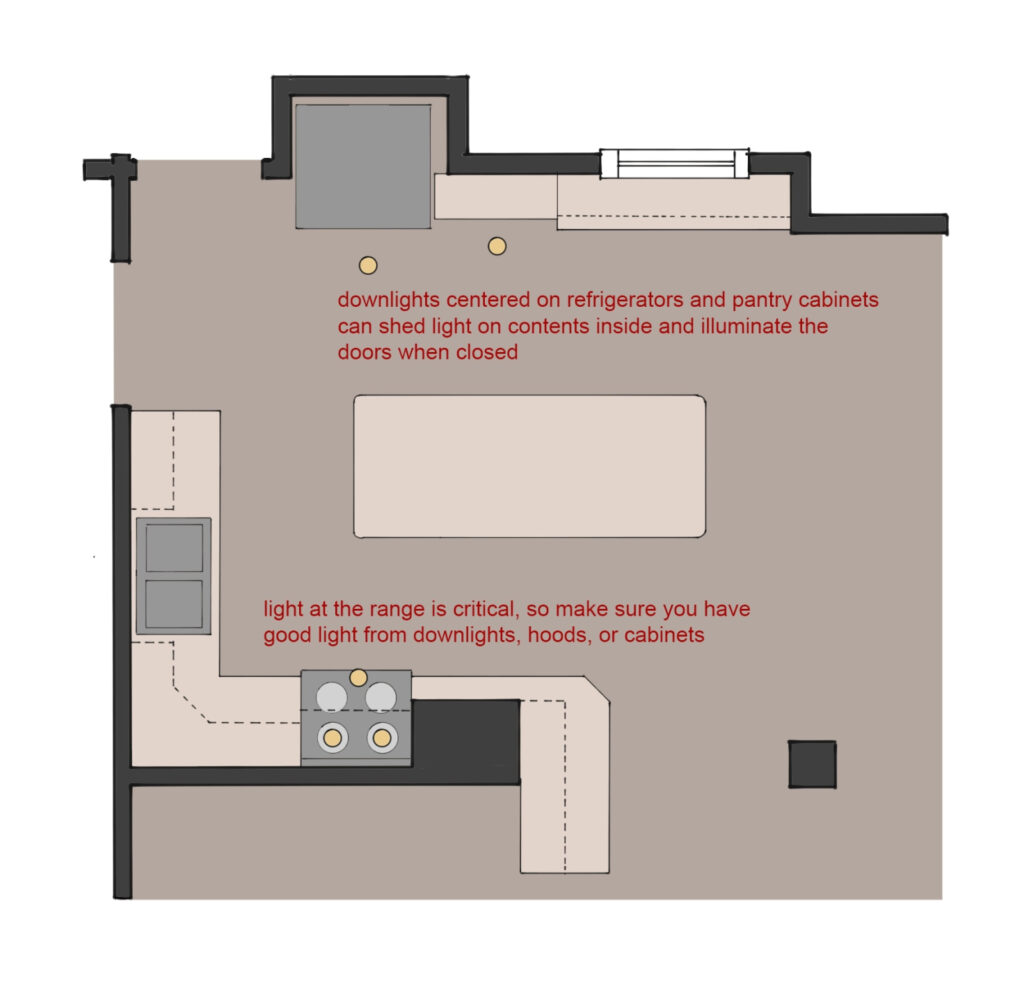
Step Two: Light Appliances, Pantries, & Upper Cabinets
Appliance lighting is getting better and better, but it is still possible to buy a range hood or wall-mounted microwave with entirely inadequate lighting. Don’t pass over this area when laying out downlights, and look for hoods with strong light. The equivalent of two 50-watt halogen PAR20 bulbs is great for a 30″ range; add more if your cooktop is larger.
Recessed downlights in front of pantries, if carefully placed, can put light on the items stored inside. The same fixture may give a nice wash of light to the front of the cabinet, which is especially beneficial on wood cabinets. The fridge is just like another pantry, and the downlight above will be much cheaper to install now than later.
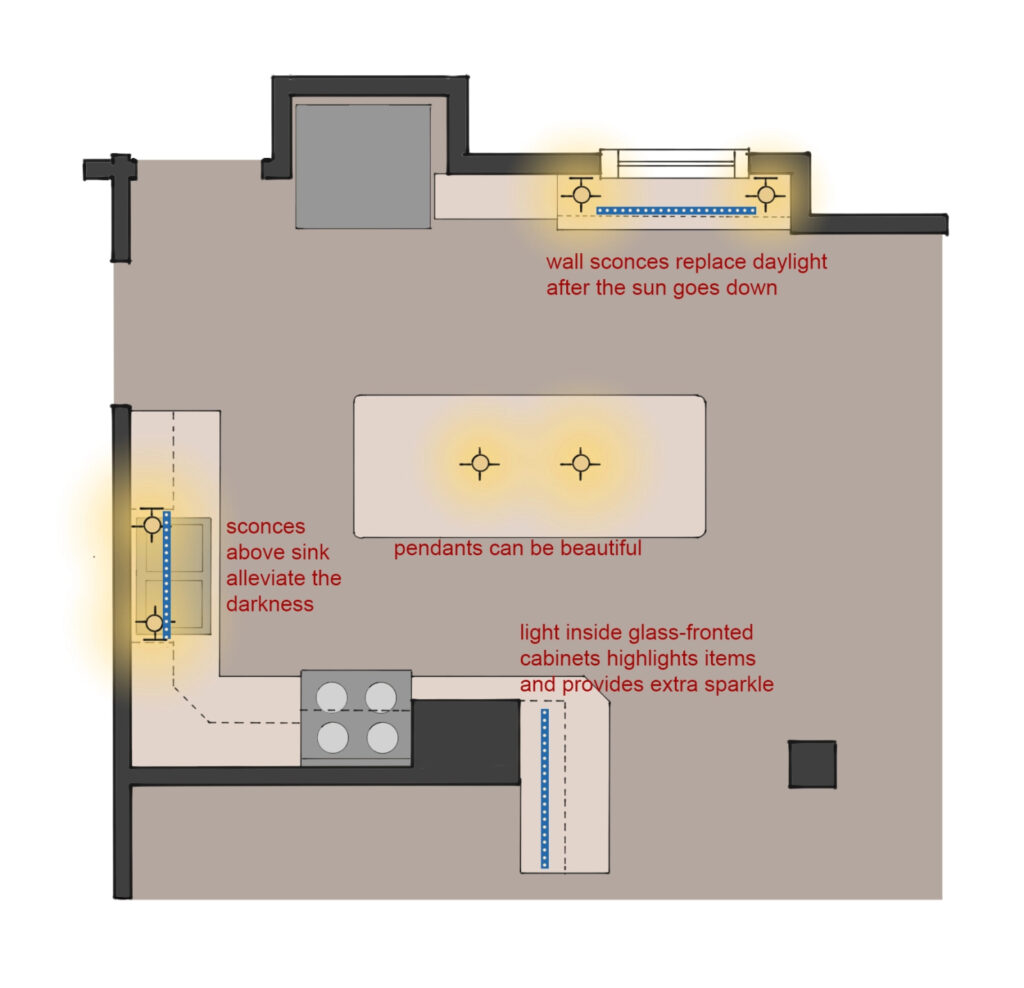
Step Three: Make it Feel Better
Why do restaurants put in fireplaces? To make you feel comfortable. When you cannot put a fireplace in the kitchen (hey, that’s an idea!), add in light that makes you feel more comfortable. Wall sconces, pendants, and illuminated cabinets can all make a

Step Four: Take Control
The plan above is complete- almost. With this many lights, it helps to be able to easily turn them on and off. A simple control system will give you a few presets (like on, off, entertain, and snack) that make it easy for you to set and memorize the settings that work best. While this will add a little extra cost up front, you’ll use it every day for as long as you own the home.
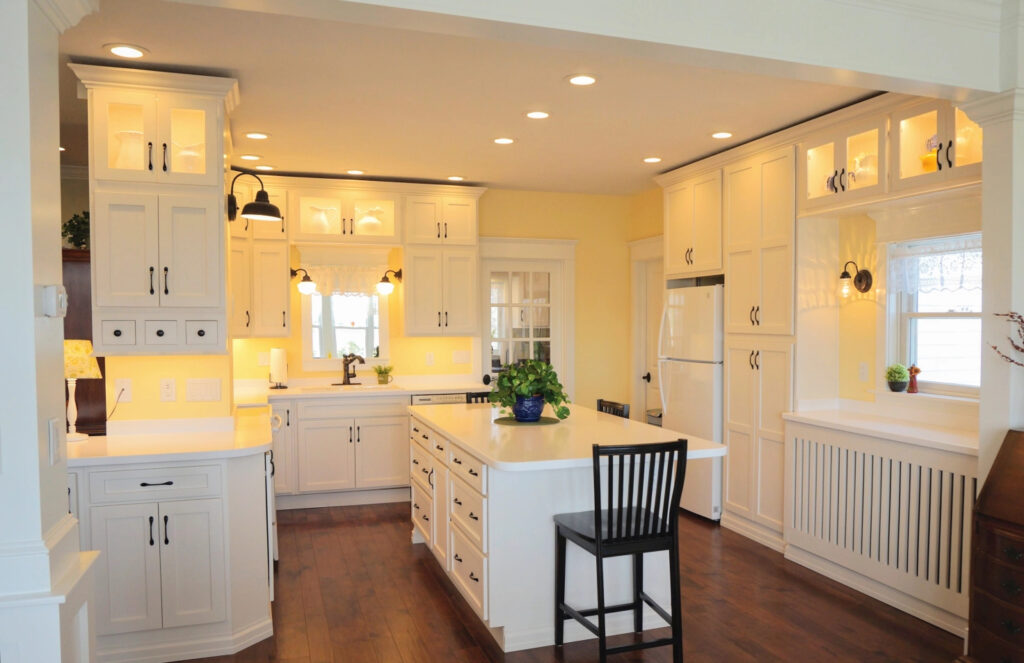
Step Five: Light the Floor
Okay, now that we’ve covered the essentials, we can light the floor. Wait…is that necessary? Usually not. The kitchen above has plenty of light on the floor, the spill and glow from other lights being more than enough for walking, cleaning, and admiring the wood. If you still want to light the floor, put light underneath the toe kicks. Besides looking cool, toe kick light works as a great nightlight.
That’s it. Check out the kitchen tag for more related advice on getting more out of your kitchen.